Content Menu
● Materials Needed
● Method 1: Simple Paper Plate Cake Stand
>> Steps:
● Method 2: Vintage Record Cake Plate
>> Steps:
● Method 3: Wood Slice Cake Plate
>> Steps:
● Method 4: Repurposed Dishes
>> Steps:
● Method 5: Cardboard Cake Plates
>> Steps:
● Additional Design Ideas
● Conclusion
● FAQ
>> 1. What type of glue should I use for plastic cups?
>> 2. Can I use regular paper plates for heavier cakes?
>> 3. How do I decorate my disposable cake plates?
>> 4. Are these DIY cake stands reusable?
>> 5. Can I use other materials besides cups?
Creating a disposable cake plate can be a fun and practical DIY project, especially for parties, events, or casual gatherings. This guide will walk you through various methods to make your own disposable cake plates using materials that are easy to find and work with. We will explore different designs, materials, and techniques, ensuring you have a variety of options to choose from. Let's get started!
Materials Needed
Before diving into the steps, gather the following materials:
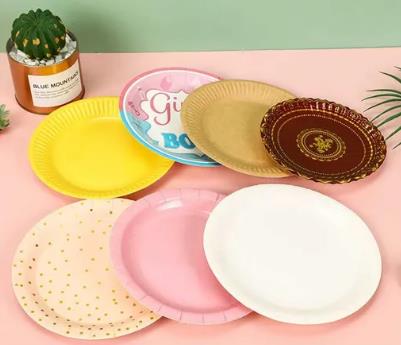
- Paper plates: Choose sturdy paper plates that can hold the weight of your cake.
- Plastic cups: These will act as the base for your cake stand.
- Glue gun and glue sticks: For securing the cups to the plates.
- Decorative items (optional): Stickers, markers, or paint to personalize your cake plates.
- Wood slices or vintage records (optional): For alternative designs.
- Old dishes (optional): To create unique cake stands through upcycling.
Method 1: Simple Paper Plate Cake Stand
This method is straightforward and requires minimal materials.
Steps:
1. Prepare the Base:
- Take a plastic cup and turn it upside down.
- Make sure it is clean and dry.
2. Attach the Plate:
- Apply a generous amount of hot glue to the bottom rim of the cup.
- Center the paper plate on top of the cup and press down firmly.
- Allow the glue to set for a few minutes.
3. Decorate (Optional):
- Use stickers or markers to add a personal touch to your cake stand.
4. Display Your Cake:
- Place your cake on top of the paper plate stand and enjoy!
This simple design is perfect for casual gatherings and can be made quickly in large quantities if needed.
Method 2: Vintage Record Cake Plate
For a more unique and decorative approach, consider using vintage records as cake plates.
Steps:
1. Gather Materials:
- Obtain two vintage records and clear acrylic sheets cut to size.
- You'll also need screws or fasteners for assembly.
2. Assemble the Layers:
- Place one acrylic sheet on each side of the record.
- Secure them together using screws at evenly spaced intervals.
3. Create Stability:
- Ensure that the records are securely fastened so they can hold weight without wobbling.
4. Final Touches:
- You can paint or decorate the acrylic sheets if desired.
5. Serve Your Cake:
- Place your cake on top of this stylish stand for a retro vibe!
Using vintage records not only gives a nostalgic feel but also makes for an eye-catching centerpiece at any event.

Method 3: Wood Slice Cake Plate
Using natural wood slices can add an earthy touch to your cake presentation.
Steps:
1. Prepare Your Wood Slice:
- Sand down any rough edges on the wood slice to ensure it's smooth.
- Clean it thoroughly before use.
2. Attach a Base:
- Use a small ramekin or bowl as a foot for your wood slice.
- Apply E-6000 adhesive to the bottom of the bowl and center it on the wood slice.
3. Cure Time:
- Allow the adhesive to cure according to package instructions before using it.
4. Decorate (Optional):
- You can paint or stain the wood slice for added aesthetics.
5. Display Your Cake:
- Set your cake on top of this rustic stand for an outdoor event or rustic-themed party!
This method is particularly popular for weddings or outdoor celebrations where a natural theme is desired.
Method 4: Repurposed Dishes
For those who enjoy upcycling, repurposing old dishes can create beautiful cake stands.
Steps:
1. Collect Dishes:
- Gather mismatched plates and bowls from thrift stores or your kitchen.
2. Find Center Points:
- Clean both dishes thoroughly and find their centers.
3. Gluing Process:
- Apply glue around the edge of the bowl and press it onto the bottom of the plate.
- Use a heavy book to hold it down while it dries overnight.
4. Finishing Touches:
- You can paint or decorate as desired.
5. Use Your Stand:
- This method gives you a unique stand that is sure to impress guests!
Repurposed dishes not only save money but also provide a charming aesthetic that fits various themes and styles.
Method 5: Cardboard Cake Plates
If you're looking for a truly disposable option that's easy to make in bulk, cardboard plates are an excellent choice.
Steps:
1. Gather Materials:
- Use sturdy cardboard sheets, scissors, and a ruler.
2. Cut Out Circles:
- Measure out circles in various sizes depending on your cake size—typically, an 8-inch diameter works well for standard cakes.
3. Reinforce If Necessary:
- If you're concerned about sturdiness, you can layer two circles together with glue in between for additional support.
4. Decorate (Optional):
- Paint or cover with decorative paper if desired.
5. Use as Cake Plates:
- Simply place your cake directly on these cardboard plates for easy disposal after use!
Cardboard plates are especially useful for large events where convenience is key, allowing you to focus on enjoying the occasion rather than worrying about cleanup.
Additional Design Ideas
To further enhance your disposable cake plates, consider these creative design ideas:
- Theme-Based Decoration: Match your cake plate designs with party themes—use colors that align with seasonal events like Halloween or Christmas.
- Personalized Messages: Write messages like “Happy Birthday” or “Congratulations” directly onto plates using permanent markers before serving your cakes.
- Layered Designs: Create multi-tiered stands by stacking different sized plates with varying heights using cups or bowls as supports in between layers.
- Nature-Inspired Elements: Incorporate elements like leaves or flowers into your designs by gluing them around the edges of your plates for an organic feel.
These ideas not only make your cake plates functional but also turn them into decorative pieces that enhance your overall presentation.
Conclusion
Making disposable cake plates is not only practical but also allows for creativity in presentation. Whether you opt for simple paper plates or more elaborate designs using vintage records or wood slices, these DIY projects are sure to enhance any dessert display while being budget-friendly and easy to assemble. With just a few materials and some imagination, anyone can create beautiful cake stands that impress guests without breaking the bank!

FAQ
1. What type of glue should I use for plastic cups?
Use a hot glue gun with glue sticks designed for plastic surfaces, such as E-6000 adhesive, which provides strong bonding for plastic materials.
2. Can I use regular paper plates for heavier cakes?
While regular paper plates can work for lighter cakes, it's best to use sturdier plates designed for heavier items if you're serving larger cakes.
3. How do I decorate my disposable cake plates?
You can use stickers, markers, paint, or even washi tape to add personal touches and themes that match your event decor.
4. Are these DIY cake stands reusable?
Most of these stands are designed as disposable; however, if made with durable materials like acrylic or glass dishes, they can be reused multiple times if cleaned properly.
5. Can I use other materials besides cups?
Yes! You can use various items like mason jars, candle holders, or even small boxes as bases for your cake stands depending on your design preferences.


